Blogroll

Showing posts with label Hair Styling. Show all posts

Sunday, 15 December 2013

Dirty Looks HK Full Head Hair Extensions


Dirty Looks HK Full Head Hair Extensions c/o - Expresso Dark Brown 16-18 Inches 160g


I am a self confessed hair extension obsessive, and so I like to consider myself a bit of an expert when it comes to all things clip in! I've been wearing hair extensions since I was 17 years old, after cutting my hair to a regrettably short length! So as a result, hair extensions have become the backbone of my hair styling routine for any night out! Over the years my extension application technique has improved as well as my choice in product. After trying brand after brand, I know what works for me and what you should always look for in a pair of extensions - that is if you want them to look heathy, look realistic and last a good length of time!

To me, the Dirty Looks hair extensions (formally know as 'Head Kandy') posses all the features that make a damn good set of hair extension! At the shortest length (12-14"), the hair extensions weigh 150g - which is a generous helping of hair! I chose the 16-18" set, which is a glorious 160g of hair. When it comes to hair extension, the thicker the better. You usually find brands offer around 90g of hair for 18" sets, which if you want a luxurious realistic look, just isn't enough at all. Lengths available range all the way up to 24-26", and you can be assured that grams are not compromised the longer the extensions get.

First time extension users are often stumped as to how to position their hair extensions, but HK take the hard work out of it as they number each weft (an impressive 8 wefts in total) and correspond this with a step by step guide to show you exactly where to clip them in. I adore their recommended method, as it means my head is covered generously from all angles. 

Overall, these extensions are a girls dream! Impossibly soft, with amazing lasting power (I still use a set purchased 2 years a go, and they are in great condition)! I recommend these for any first time extension users, as well as to experienced users who are looking to try something new! I guarantee you won't be disappointed - definitely an investment you won't regret!

Thursday, 7 November 2013

Lee Stafford Nourishing Argan Oil Big Fat Hair Tong GIVEAWAY!


The  amazing Lee Stafford Nourishing Argan Oil Big Fat Hair Tong is infused with Moroccan Argan Oil, with a huge barrel - PERFECT for those soft, glossy loose curls. I am obsessed with it, in fact so obsessed, I'm giving one away to one of my lucky followers! I can't stress what an amazing invention this is and how easy it makes curling your hair!

I love hosting giveaways on my blog, and the response is always amazing, so I'm so excited to be doing another! 
To enter, all you need to do is complete the rafflecopter form below! There are four chances for you to enter, so plenty of chances to win! Plus, you can tweet about the giveaway daily for extra entries! Unfortunately, this giveaway is only open to those living in the UK for delivery reasons. The giveaway will close on Friday 22nd November, and I will conact the winner that weekend!
a Rafflecopter giveaway

Sunday, 3 February 2013

Headkandy 20-22" Clip In Hair Extensions


You've probably heard me mention Headkany a few times by now. They are by far my favourite hair extension brand I've ever tried, and if anyone asks me which extensions I'd recommend, it would be Headkandy every time.

I got myself a second set of these extensions back in September for my birthday. I didn't get them because my current set were worn out, if anything quite the opposite, but just because I wanted to be able to vary my hair styling with longer extensions. These extensions sit at waist length, so guaranteed to make you feel like a mermaid! Plus points of Headkandy hair extensions (not that I can think of any negative points) include the impressively generous weight of the hair (180g in the 20-22in set - wow). Also, a feature uncommon in most other brands is the thickness from root to tip. Because of this the hair looks outstandingly healthy and is much less likely to be spotted out as hair extensions - even to the keenest of eyes! The quad weft is another feature that knocks these extensions out the park. All Headkany sets include 10 pieces of hair, including their infamous quad weft, formed of 4 pieces all sewn together. The piece isn't any more bulky than any of the others, so still blends very well and sits neatly around the widest part of your head. 

I rarely wash these extensions (regular washing will cause your extensions to dry out and turn brittle), however, they maintain their shine none the less. The texture and quality is beyond impressive and gives me the long, beautiful locks I've always wanted. Thoroughly worth the money and an investment you won't regret. 

Monday, 14 January 2013

My Beauty Inspiration: The Kardashians

Source
Sponsored Post
Some of you may have picked up if you've been following my blog for a while, or are one of my twitter buddies, that I'm an avid Kardashian fan. That being said, I thought it would be fun to do a post on what I've learnt from Armenian beauties! Being from Middle East descent myself, I feel I can relate to their look so often take inspiration from their beauty hints and tips. Having said that, here's what I've learnt from obsessing over the Kardashains...

Firstly, strong brows! Kim K has the most beautifully bold brows. G
etting treatments such as HD Brows takes the hassle out of growing and grooming your brows yourself; tinting, threading and waxing your brows to perfection! A great way  to instantly thicken the look of your natural brow, as I do, is to pencil them in. I use 17's Brow Sculpting pencil lightly then brush them through with a brow comb. When maintaining my brows I often concentrate my plucking around the arch (without making them too thin) whilst leaving the inner brow, keeping this point the thickest part. The Kardashian sisters are known to get their's professionally waxed and tweezed on a regular basis.

The girls flawless make up looks have lead on a never ending search for 'mattifying this' and 'anti-oil that' in the constant battle to achieve a shine free, immaculate look! For starters, primers are key. 
Brands such as MAC and Revlon sell color correcting foundation primers in a variety of shades including purple, yellow and green to be used according to your complexion. Kim was famously pictured applying a bright yellow colour correcting primer to balance out her skin tone before applying foundation. I more so use primers to keep my foundation in place and in an attempt to keep my oily skin at bay. I was recently recommend Witch's Anti-Blemish Skin Clearing Primer, which has helped a lot in keeping my make up in place during the 9 to 5 work day!

Long, luscious locks! Well known for constantly sporting a head full of hair extensions, the Kardashian's are 
definitely my hair icons! I often wear Head Kandy's 16-18" or 20-22" to achieved a thick head of glossy hair. Kourtney has shared on her blog of how she gets her extensions sewn in, often known as a weave. But for ease and every day use, clip in extension are a quick alternative with minimal damage. To achieve their high shine style, I use a generous combination of Moroccan Oil and Macadamia Oil, a great combination to heal split ends quick and give hair an instant boost. I've noticed a huge difference to my hair's health ever since using these two products when washing my hair, and its grown a significant amount too! 

Lastly, the Kardashians have taught me to always be beautifully bronzed and smooth as can be! 
To exfoliate and remove fake tan, Kim Kardashian visits a Korean spa in downtown Los Angeles for a body scrub. However, we can't all afford such luxury! Lush's Rub Rub Rub Shower Scrub helps me keep oh so smooth, buffing away all the bad toxins. And when I fancy topping up the tan at home, I use Garnier's Summerbody in Deep, building a natural warm glow. As well as this, the girls are famously known for their extensive laser hair removal. Go to a clinic such as Sk:n Clinic for a run of treatment sessions, or even invest in a hair free future and get your own home laser removal system like the no!no! (which I'm considering getting myself)!

So who are your beauty icons? Where do you draw your inspiration from? I want to hear all your beauty hints, tips and tricks too!

Saturday, 24 November 2012

ghd Style & Protect Gift Set


Now here's a great Christmas gift idea for any hair obsessed girl - like me ;) This sleek and sophisticated set includes the Style Straight & Smooth Spray, the Final Style Shine Spray, a paddle brush and two sectioning clips.

The ghd Style Straight & Smooth Spray is designed to h
elp smooth and de-frizz your hair, containing ghd Heat Protection System that ensures a sleek and long lasting look. This heat protectant is light weight  and fruity, perfect for refreshing your hair between washes before heat styling. I struggle to find a heat protecting spray that doesn't weigh down my hair and make it greasy when applying to dry hair, however a few spritz of the straight and smooth spray absorbs into my hair really quickly and it doesn't feel like I've over loaded my hair with product. Despite the spray being aimed at straight hair styles, I do find it helped in creating loose and silky curls - my favourite hair look. 

The Final Style Shine Spray is my new favourite hair spray! I hate hate hair sprays that stiffen your hair and give it that crunchy, unnatural look. This spray is so fine and allows your to rework your hair whilst still holding the style naturally. It also smells sweet and fresh unlike my usual hair spray which often chokes me to death when I apply it!

I love the paddle brush that comes with the set, perfect for post-hair curling when I want to soften my curls and create smooth waves. Followed by the Final Shine Spray is the perfect combination for quick styling. 


This kit is a perfect essentials kit, making your hair gloriously shiny with minimal effort. 

Sunday, 2 September 2012

I&K Dip Dye Clip-in Straight Hair Extensions

I&K Dip Dye Clip-in Straight Hair Extensions in Darkest Brown/Auburn: Hair Trade (c/o)

i've been eagerly waiting for a long while now to get my mitts on a set of ombre hair extensions! I bleached my own set at the beginning of the year, but I wasn't overly satisfied with them. So when i discovered Hair Trade had their own dip dyed extensions I was very, very excited!

i chose a full head, which is 120g of hair at 18inches long as i still wanted to add my usual length as well as the colour. i also went for auburn over light blonde because i wanted the Khloe Kardashian look :) The condition of the extensions are beautiful, very silky and healthy looking. The blonde ends do not look damaged which is brilliant, as those who ombre their hair can sometimes get very damaged, brittle ends. 

I love the colour, I think its gorgeous and really vibrant. I think these extensions are a great alternative if, like me, you don't want to bleach your actual hair. i've spent so long growing mine that I daren't apply bleach to my own hair. i've been desperate to change up my look however, and so this is right up my street, and then i can simply unclip them when I'm done with them for the day!

I would really recommend these extensions for people who have thin to medium hair as i feel it will blend in better. i have quick thick hair, so i feel i need to clip the sides up to help make the extensions more discreet. 

if you'd like help with how to apply your hair extensions, i put a video together a while ago you can watch here.

Friday, 10 August 2012

My Current Hair Care Routine


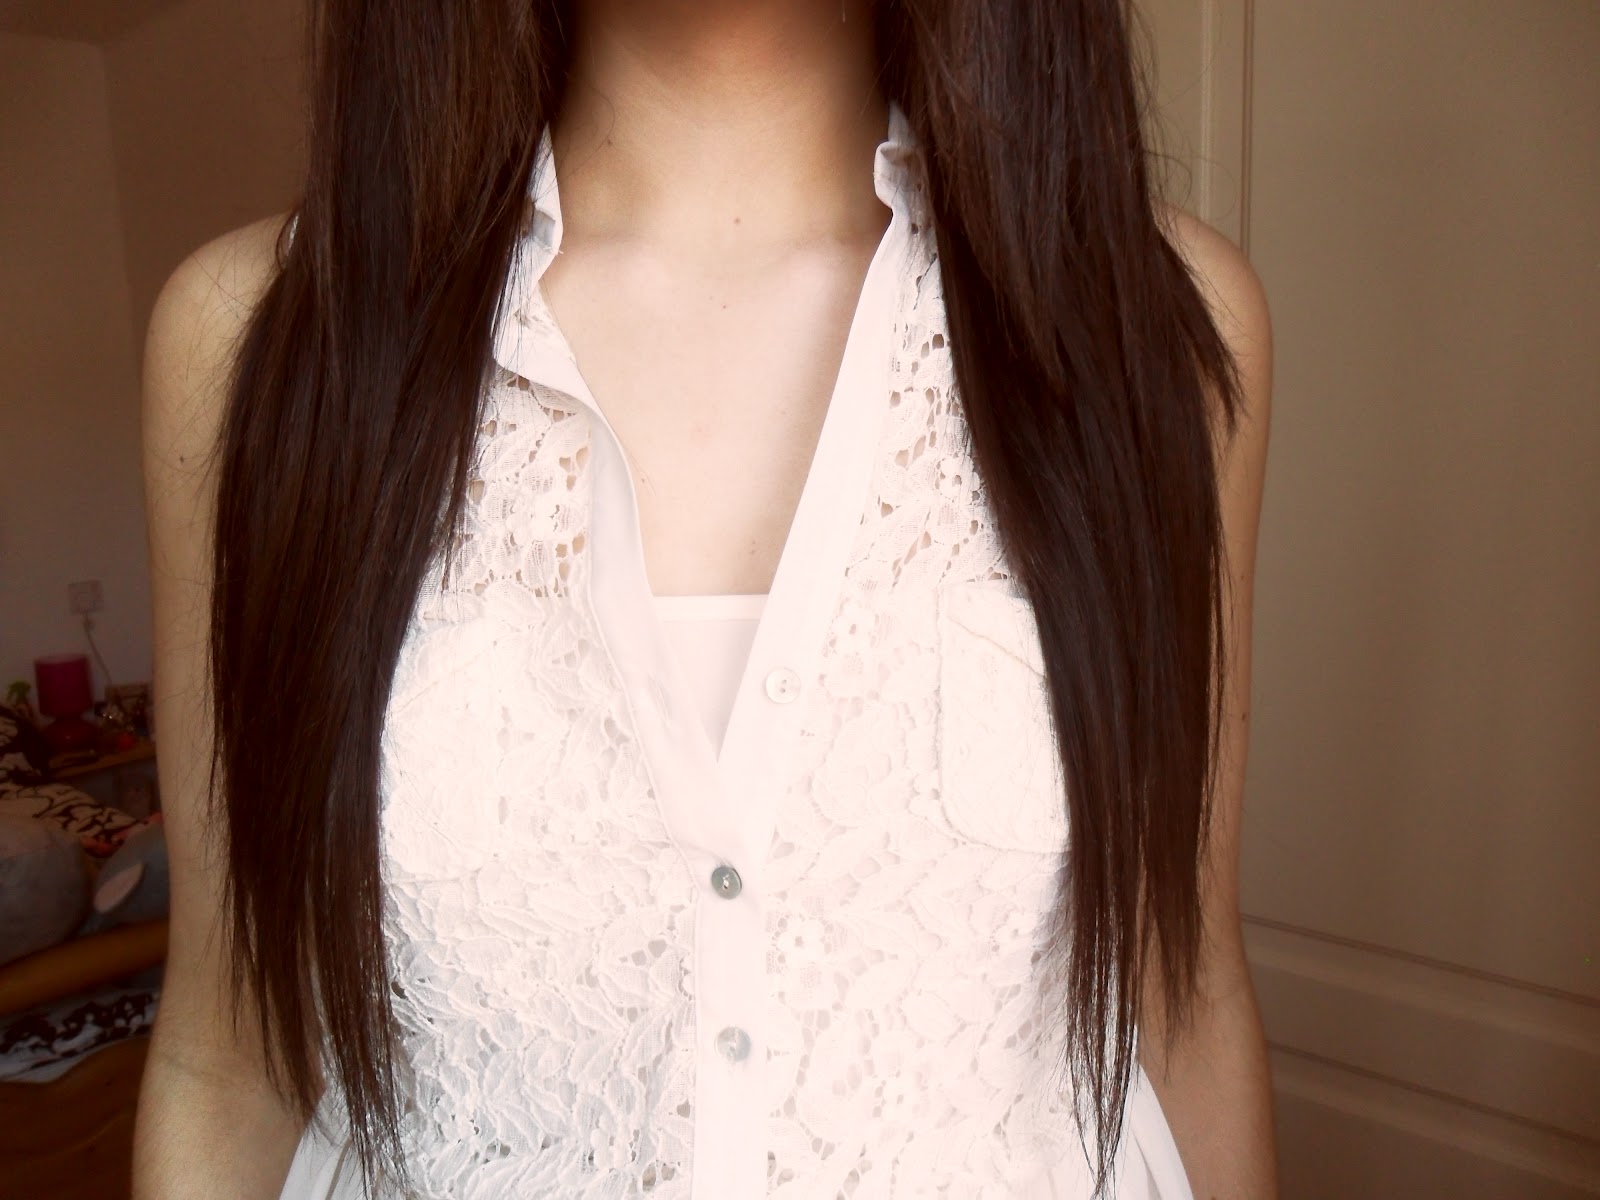
I've stepped my hair care routine up a notch since I had it cut about a month ago. I've been growing my hair for about three years now, taking hair growth vitamins and using hair encouragement hair masks and my hair has ever so slowly been growing. However, I know the one thing I've missed out in this routine is stability. I never paid too much attention to what shampoo and conditioner I was picking up, would sprits a bit of heat protection on and that was it. Being a student, I'd just pick up whatever shampoo/conditioner combos were on offer and that was it. To be honest, I don't understand now how I was confused that my hair was barely budging!

I've been reading up a lot about Argan oil recently and the wonders of this amazing oil, and now from experiencing it on my own hair I can tell you it is definitely the best thing you can put on your hair. With my current routine, I'm feeling a definite difference in the feel of my hair, the look of my hair and the growth of my hair. The ends look thicker, it feels so, so soft and I've definitely gained back the length I got cut off last month already.

So, here's a run through of what I'm using at the moment, and yes, they all contain Argan oil!


I've been looking for a new shampoo for a while and was prepared to spend a bit of money on a decent one that was going to make a visible difference. However, on a trip to Morrisons I was perusing the toiletries isle and came across this beauty, for only £3.80 if I remember correctly. As soon as I saw those magic words: 'Argan oil' on the back, I nabbed it straight away! 

Its a big 400ml bottle, so great value for money for starters. On the bottle it claims to nourish and tame last smoothness for dry, frizzy and rebellious hair. Its anti-humidity (great for if you're going on holiday, which I'm not wah) and claims up to 48hrs of anti-frizz! However, above all this probably the two most important factors for myself are the Argan oil contend and the thermo protect, as I'm a major heat whore! 

This shampoo smells amazing, really luxurious and lathers up a treat! In the shower I can instantly feel the smoothing effects as I'm washing it out which I find really impressive. Its consistency fairly oily, indicating to me that the Argan oil is very present, as well as this it is that ominous golden colour that we associate with Argan. Its so smooth, I can actually rub it into my dry skin and it absorbs in very easily, leaving quite a smooth finish! I mention this as Argan is also known for its skin smoothing benefits.


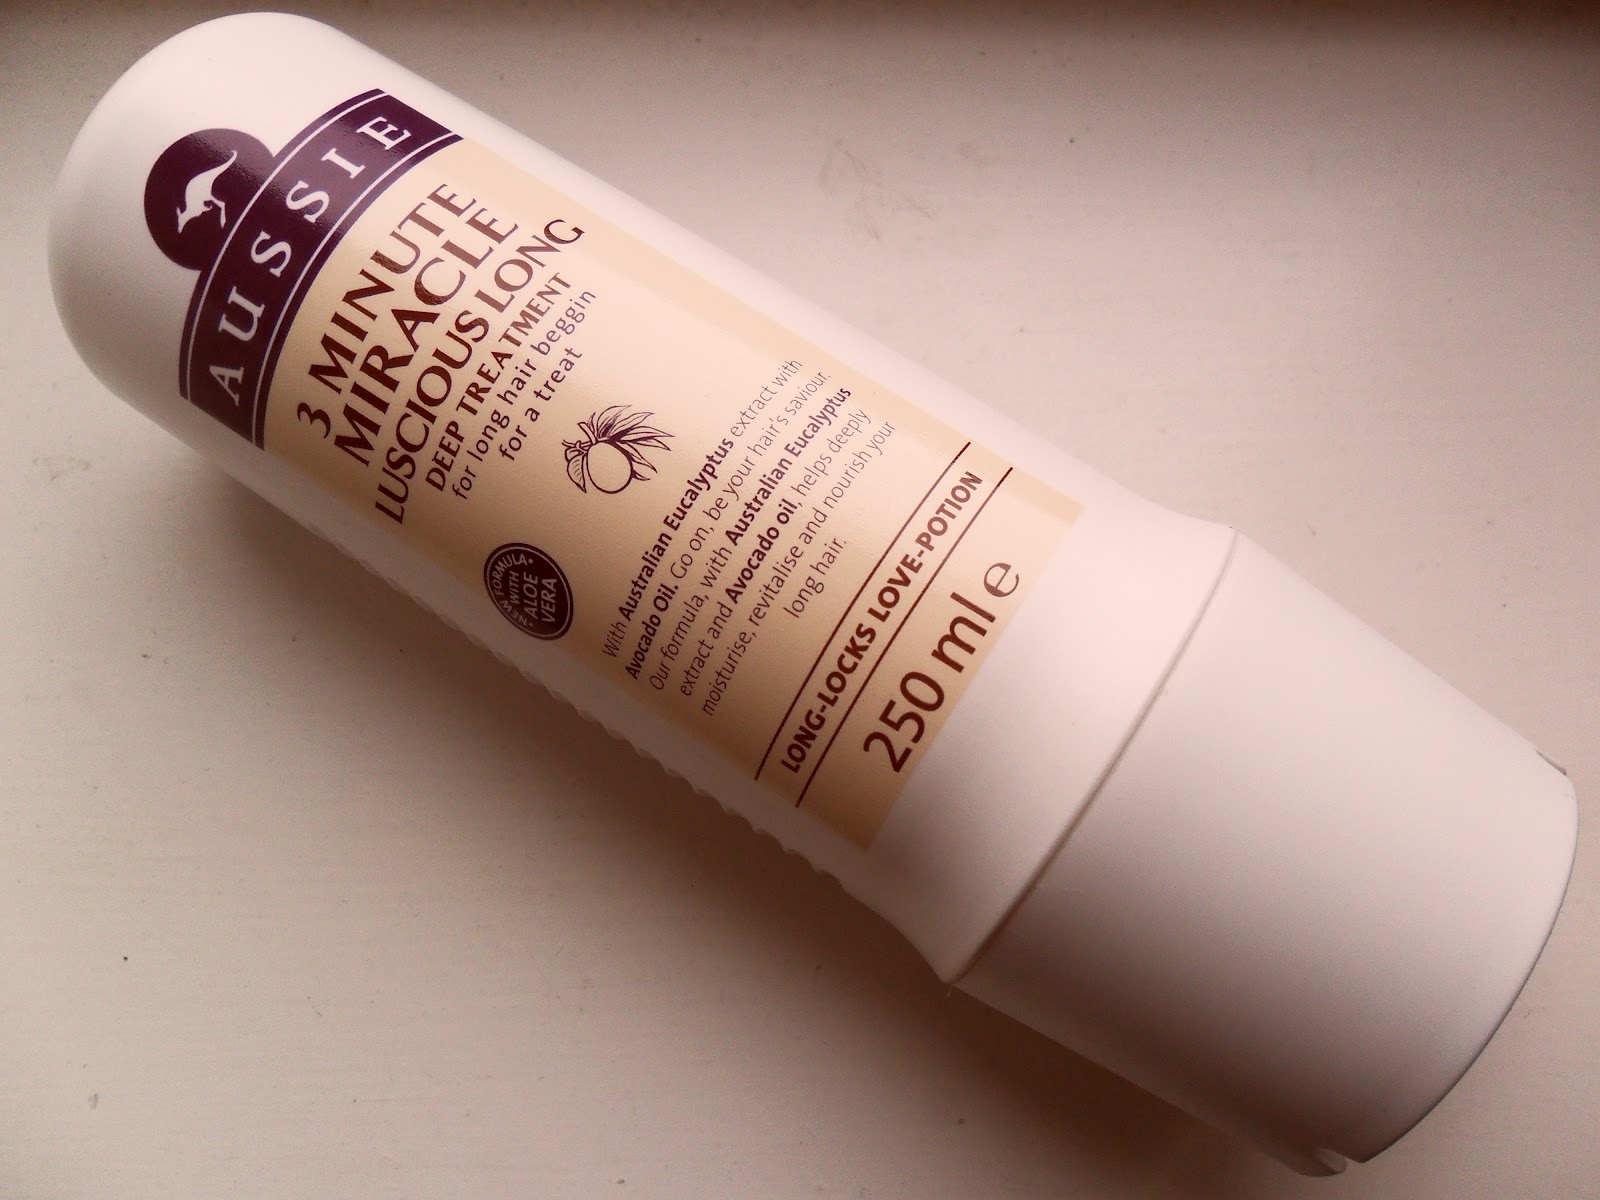
Conditioner: Moroccan Oil Restorative Hair Mask (c/o Hair Trade)

I think everyone knows that Moroccan Oil is the must have hair product at the moment. I've been desperate to try their hair mask out for myself for months and months, after reading amazing reviews and watching YouTubers raving about the incredible effects of the Moroccan Oil treatments. 

Moroccan Oil's range include everything from glimmer spray to luminous hair spray, all containing the magical ingredient of Argan oil! The restorative mask is designed to help reconstruct and rebuild, r
everses damage done by chemicals, restores hair from environmental elements like sun and wind, penetrate deep into the hair with a unique formula brings out hairs inner health and leaves hair shiny and moisturised. 

The conditioner itself has a very rich and smooth feel to it. I scoop a small amount into my hand and smooth it through my mids and ends of my hair and leave it in while I shave my legs and wash my face. I would presume for a more intense effect you could leave it in for about half an hour and wash out. I really think it does the job in depositing the Argan into my hair and I've definitely noticed my ends look thicker after I've used it, so it must be helping with my split and dead ends. The smell is very distinct and smells fresh and revitalising, plus I feel the Argan does remain in my hair after I've washed it out.

I use this every other time I was my hair, using the
Boots Coconut and Almond Hair Mask in between, as I don't want my hair to become resistant to it as I've heard can happen with intensive conditioners (don't know if this is true?). Overall, a very impressive conditioning mask, worth the money.


This was an exciting discovery for me. My mum always goes on about the Kérastase Elixr Ultime Versatile Beautifying Oil and what a difference it has made to her hair (baring in mind she has long, regularly coloured hair) and I wanted to try something similar to this but wasn't keen on the price tag.

I came across the Avon treatment when I was researching for an article and instantly found some great reviews of it. It was a real bargain especially seeing as it contains Argan oil, so thought it was worth the risk and went for it. I pump two squirts into the palm of my hand, rub in between my hands slightly, then run through the mids and ends of my towel dried hair to absorb in as my hair dries. Spraying on some heat defence spray (I used Morrison's own as it smells of melon and mangos) and blow dry my hair as usual.

I do try to use the hair dryer on the coolest temperature on my ends now to try and minimise the heat damage as much as possible. After drying my hair it honestly feels intensely smooth. This oil treatment has literally been my saviour and really is the fitting way to end my new hair care routine. My hair definitely feels more moisturised and hydrated which I'm hoping will continue in encouraging my hair to grow!

What is your current routine? Have you made any changes which have made a significant difference? And is anyone else as obsessed with Argan oil as I am?! haha!

Tuesday, 3 July 2012

Quick fix: the Sleek Hair Bun


I struggle creating the large, rounded bun effect on my own head quite often. I love the look so much, and have been able to create lovely looking buns on others, but when it comes to myself its a bit of a dud. Enter Hair Trade's Sleek Hair Bun!

This beautiful, glossy bun has two simple glides attached inside of the bun, making attaching it a easy and quick process. I began by tying my hair up into my usual bun, then styling as I usually would by letting some loose waves fall around my face, then loosened up the hair around my bun and back combed to allow the glides something stable to hold on to. You then sit the sleek hair bun over your natural bun and slide the glides in underneath. With the braided bun like mine, it makes for a great laid back bohemian look.   

You could also try a more pulled back and tidy look, like Kim Kardashian often wears. She often wears her hair all pulled back with some volume created in the front. 

Overall, I love this bun! I think its such a fantastically easy way to create a beautiful look in a matter of minutes, and I'm really excited to try out some different looks with it! I will be sure to share them with you all ;)

Thursday, 31 May 2012

Spot The Difference?

Well, some of you may notice the difference here, some may not, but here is me with out my beloved hair extensions. 

For some of you, this may not be a big deal, and you may not get why I've done a entire post dedicated to me without my clip in hair extensions in, but for me, it is quite a big deal! Although I do wear my hair extensions a lot, I felt it was fair to share with you what my natural hair is actually like. I get a lot of comments on my hair, and my followers are so nice about it, and although I put a lot of effort into styling my hair with extensions to make it look natural, I sometimes feel a twinge of guilt at the nice comments thinking followers may not know they're extensions.

I may sound a bit dramatic, and if I do then I apologise! But to be honest, I just am not keen on my hair at its natural length or thickness. And its grown into quite a habit to wear my extensions, otherwise I just don't feel attractive.

So, baring a little bit of myself to you guys today. Seems so petty when I put it down in words, but I spose everyone's got their insecurities?

P.S. My dress is from H&M :)

Friday, 25 May 2012

I&K Clip In Straight Hair Extensions

I am a dedicated hair extension wearer and lover. Having been wearing hair extensions since I was 17, I feel like I have a pretty good grasp of what makes a good set of extensions. I've ordered from Hair Trade before, when I was 18 and I loved them then. I actually order a few sets in succession because they had become a firm favourite. Now, at 21, I can confirm the I&K extensions are just as great as ever.

I chose the shade Darkest Brown in 18 inches which can be brought for £59.99 - a decent price for a set of human hair extensions. You get ten pieces in the set, two are without clips so I'd recommend picking up a packet from ebay to sew onto these two extra strips - the more hair the better! 

One of the first things I noticed about these extensions were how soft they felt. I instantly felt the need to rub them against my face, as the softness and quality was outstanding. When attaching the clips, I really liked how tightly the clips gripped the hair, after wearing them for a few hours they hadn't budged due to their secure grip. They're also small and discreet clips, so hid within my natural hair very easily. 

Another feature I picked up on was how lightweight the hair felt when it was all in. With such small clips I felt I could move my head and hair around easily, creating a very natural look and feel. I also love the length of the hair, as with these extensions you will find that if you're ordering 18inches, like I did, you will get 20inches, as the extensions always come 2inches longer - essentially, getting more for your money!

Overall, I really like these hair extensions. I really appreciate the change of clip and how secure the hair felt to my head, definitely a plus for day to day, and daytime use. At 120g of hair, you get a decent amount, enough to cover a whole head easily. Although, its not as much hair as I've experienced in more expensive sets, this hair is definitely perfect if you're looking for length over thickening your natural hair, and you could always create a thicker look from curling. As you can of course curl, straighten and dye your these extensions as you could with your natural hair.

Its also worth mentioning that the extensions arrive in a long box, keeping them flat so they don't kink or curl, ready to wear straight out the packet! I would 100% recommend these extensions, especially for such a reasonable price for such beautiful hair.

Sunday, 22 April 2012

How to: Applying Clip In Hair Extensions (Video)

So, I've uploaded another YouTube video for you all, this time on how I put in my hair extensions! It's come out a little over exposed which has annoyed me, you just can't rely on technology to be consistent I swear -_-

Anyway, I hope some of you will find this useful and if you have any questions about hair extensions then don't hesitate to ask! Oh, and don't forget to watch in 720P HD! ;)

Saturday, 24 March 2012

I'm on Youtube!


Hey loves, I've just uploaded my first youtube video! You can watch it here! I decided to make it on how I do my hair,
as I asked you guys in a previous post what you thought of the idea and I got the thumbs up!


I am a little nervous of what people's reactions will be, but hopefully you will all like it! Thanks so much to my followers for their continuing support on my blog, I really do appreciate it so much.

Sunday, 29 January 2012

Ombre Hair


Okay, so maybe it's not the most drastic of differences. But as most first time bleachers/dip dyers are, I was a little nervous. But I really like how it turned out! And now that I've been brave enough to do it for the first time, I may go over it again in the near future and go a little higher!


I used a high lighting kit I picked up in Wilkinsons by L'Oreal called Prefect Blonde Creme Maximum Bleaching Kit. I went for 'maximum' as it claimed that it can get your hair up to 6 tones lighter, which I thought was best for such dark hair like mine. I also picked up this tinting brush from Wilkos, which was only £1. I thought using this would help me create that dip dye effect.

Confession time! I didn't actually do this to my own hair! I did it to extensions! I would seriously recommend this if you're not keen on the idea of bleaching the tips of your own hair as this is a highly damaging process that will take a lot of after care to keep healthy. My ends are no good, and I knew if I bleached them it wouldn't be too long before I was getting 3 inches cut off and I just can't stand that thought! So, enter ebay!! I purchased these 20 inch 100g hair extensions for £29.99, which is a really good price. They delivered next day as well, which I was really impressed by!

Now here's a lovely photo of my bathroom floor, during attempt one at bleaching the tips! I organised my hair extensions into bundles and smothered on both sides with the bleach. I then wrapped them up in the tin foil (to keep in the heat) for half an hour, giving the tin foil a blast with my hair dryer after 15 mins. I unwrapped after 30 mins, and couldn't really see a considerable change, so I re-covered them, gave the tin foil another blast with my hair dryer and left for another 15 mins. I then went back to check again and decided I'd give them one finally going over with the hair dryer and another 10 mins. 

After this I unwrapped them and rinsed out the bleach in the sink. I then blow dryer to see how the colour had come out. I was happy that the colour had actually changed, because I couldn't believe how long I had to leave them for (considering the leaflet said to leave no longer than 30 mins. opps!) I'd ended up with a more chestnut brown, which I quite liked, but I wanted more gradient to the colour, so went back over the very tips and wrapped back in tin foil. I gave the foil a once over with my hair dryer and left for another 30 mins. I then rinsed and dried the hair again, and clipped them in to see how I liked it so far. I was pleased, but I'd created a bit of a straight line where I had applied the bleach initially. Damn. 

Back to the bathroom! I put about an inch and a half worth of bleach above where I had previously bleached the first time. I tried to make the edge softer by dabbing away with my tinting brush. I wrapped in tin foil once again, and got the old hair dryer out on them, and left for a final 30 mins.


Excuse the dodgy photo quality, but this was taken on my phone to send to my boyfriend after I'd finished! I think it shows the gradient I was trying to achieve quite well.

Anyway, thanks for sticking with me through my long winded explanation of my ombre experience! I hope you like it!

Wednesday, 18 January 2012

Aussie 3 Minute Miracle Luscious Long Deep Treatment

I am in constant turmoil with my hair. I most definitely have a love/hate relationship with it, as I think most girls do with their hair. My hair's been through a lot of thermal abuse through out its 21 years, and I really don't get it cut anywhere near as often as I should. So, keen on keeping the mids and lengths of my hair as soft as I can, I picked up a bottle of Aussie's 3 Minute Miracle Luscious Long Deep Treatment from Superdrug. It's currently on offer for £3.49, so I had to grab it. In the past I've always picked up the sachets when I've felt my hair was in need of a treat, so it's nice to finally have a lovely big bottle of the stuff! 

I've been using it for the past week or so, replacing my usual TRESemmé Thermal Recovery conditioner during every other wash. It's important not to use a deep conditioning treatment every time you wash your hair, as you don't want your hair to become dependent on the product. The product smells so yummy, it has a beautiful fresh, sweet scent to it. It's consistency is fairly thick, and has an extremely silky feel to it as your rub it through your hair. I usually leave it in whilst I shave my legs and wash my face in the shower, leaving it to work it's 'miracle' on my split ends! My hair does feel significantly softer after I use this Aussie deep treatment. After blow drying, the lengths of my hair feel much less brittle. I'm hoping if I continue using this product as I have been, there will be a much more permanent improvement. Well, at least until I give in to the inevitable and finally get my hair cut!
  

Monday, 28 November 2011

Tresemme Salon Professional Ceramic Styler 230


Here are my Tresemme hair straighteners, which I've had for just under a month now and I can happily say they are fantastic.

I brought these straighteners when my previous pair completely cut out on me out of the blue after only a year (by which time I came to realise the guarantee had expired! Terrible!). Terrified as to what I was going to do without my most important hair appliance, I searched Amazon desperately in search of a replacement pair. Usually, if you want a decent set of ceramic hair straighteners, you're looking at paying £70 up really. So, when I came across the Tresemme Salon Professional Ceramic Styler 230 I was pretty convinced they were too good to be true. All the reviews were brilliant, saying that the appliance met, if not exceeded, the high standards of the infamous GHDs. Well, for a measly £20, saving £40 on it's RRP, how could I say no? (Plus, the guarantee was 5 years, much better!)

When I received the straighteners I was pleasantly surprised to see they came with a heat proof travel pouch, which is always useful to have. I immediately plugged the straighteners in and switched them onto their highest setting (an impressive 230 degrees), waited for them to heat up (which takes less that 15 seconds!!) and got stuck into my hair. The 1 inch ceramic plates straighten like a dream, sliding through my hair much more smoothly than my previous, much more expensive hair straighteners.

It's probably important to note that I have quite thick hair, which has always been curly and prone to frizzing. And if a pair of straighteners can tackle that then you know they're a good'un!

Tresemme Salon Professional Ceramic Styler 230 have a very smooth, rounded shell which makes creating curls so easy. I've found with previous, more square, plastic shelled straighteners that when you try and curl your tresses, the curls come out quite square and tight. Where as with these Tresemme straighteners they glide through your hair, helping me create some lovely wavy looks. Plus, the 3 metre swivel cord means you can reach right around your head with ease.

An added bonus for me is the auto shut off feature. A bit of a must for me as I've come home a few times to find my flat overwhelmingly smelt of burning after leaving my straighteners on whilst leaving in a hurry! So I've been pretty lucky to not have burnt the whole block down as of yet!

Overall, I've never been so pleasantly surprised by a hair appliance before, and I 100% recommend these to anyone. It really does do the job to a fantastic standard. 


Sunday, 27 November 2011

My All Time Favourites


001. The Body Shop's Big and Curvy Mascara is by far the best mascara I've ever had. I originally got it as a sample from Body Shop and was so blown away that I brought a new bottle straight away as a back up. I do like my mascara's thick and dark, giving me a heavy look to define my eyes, and with a few coats this is what big and curvy delivers. I've been though a lot of mascara's in my 21 years, but I think I have found my faithful companion in this mascara. Proving that big and curvy, is beautiful!

002. My two must use hair products, both of which I came across completely by accident. Firstly, Morrison's Heat Protection Spray. I was out of heat defence, so picked up the cheapest bottle I could find on my weekly food shop. I'm sure it cost £2 or less. This spray for starters, smells AMAZING! No exaggeration, it's like pure mangos or something. It doesn't leave your hair feeling stiff or make it greasy easily like I've found with previous heat defence sprays, and it's defiantly done the job when it comes to protecting my hair from daily blow drying, straightening and curling.
Secondly, Boot's Coconut & Almond Leave-in Conditioner for normal to dry hair. I am always after the latest product to keep my hair soft and healthy, as I tend to avoid the hairdresser quite often and, as I mentioned before it's important that I defend my hair from the daily wear and tear of styling. Now, I can honestly say, this is the best leave-in conditioner I've ever used. Not normally one to use leave-in conditioners as I normally find they make my hair greasy, I picked this one up as part of a 3 for 2 promotion when I was in need of a third item. I gave it a go that night and haven't looked back since. Spraying it from my mids to ends liberally when my hair is still damp, this spray kept my hair soft against the holiday elements of the sun and salty sea. It also has seen me through the change of seasons, as my hair normally starts to dry out as we move from summer to winter.

003. Urban Decay's Naked Eye Palette is by far my favourite eye make up palette I've ever owned. I think it's fair to say this palette is loved by many cosmetics lovers, and I am definitely one of them. I'm a huge fan of eye make up, it's my favourite part of doing my make up. Naked offers an amazing set of neutral and nude shades along with some sparkly smokey colours, giving your look depth. The colour pay off for all the colours is amazing, the shades, especially the darker colours are so pigmented and I never experience any fall out. Although this palette may be slightly on the pricey side, I think it's definitely an investment worth making. And word on the street is that Urban Decay are releasing Naked 2! OH the excitement!

004. Last, but by no means least, my favourite make up product of all time, 17's Shine Control Pressed Powder. I've been using this powder since I first started wearing make up. I'm lucky enough that they've continued to sell this powder for the last 7 years, but I suppose it goes to show I'm not this only one who depends on this product! Shine control is a major concern for a lot of girls. I have quite oily skin, admittedly not as oily as it was when I was younger but it's still an on going issue. However, my shine is beautifully concealed by 17's Shine Control. After I've applied my foundation and concealer, I apply the powder over my whole face. It has great coverage, covering blemishes well and give a flatteringly smooth finish. I don't think I'll ever be without this powder. And as long as they keep selling it, I'll keep buying it! 

Sunday, 23 October 2011

HeadKandy Hair Extensions Review

So, I’ve had my HeadKandy Hair Extensions for just over two months now; long enough for me to give these extensions an honest and fair review.

Now, I brought the 16-18in’ deluxe full head set, for £74.99 - a reasonable price when it comes to luxury hair extensions. In this set you get 160 grams of hair, and for those new to hair extensions - this is a lot of hair for your money!!

Usually going for longer extensions at about 20/22in’, I decided to go with 16-18 as I’ve had experiences with longer extensions getting a little ratty at the ends. This was probably down to there being lesser hair, which you’ll often find in cheaper sets. However, with these extensions, the hair is thick from root to tip; giving you a full bodied, natural, healthy look.
Every set of HeadKandy extensions comes with 10 wefts for a good full coverage of the whole head. Each weft is numbered (barr the two individual clips) 1-8, and comes with a booklet signaling where to place each weft according to number on your head. I found this amazingly useful, as the way they placed the extensions was different to how I usually do it and I got a far more natural look from this.


HeadKandy’s secret weapon comes in the form of a QUAD WEFT! Yes, a quad weft. This extension sits around mid head point and blends all the hair perfectly together. It’s so thick - (pictured above) you cannot see through the hair when I hold it up. This is luxury hair extensions at their best, providing excellent coverage and a real natural bounce.

The first time I put these extensions in, I felt like I’d just had a really expensive haircut. And even after washing them a few time and straightening (very carefully) they remain silky and gorgeous. I get the most amazing compliments on my hair when I wear this set and feel fantastic.

I 100% recommend these hair extensions to anyone.